Saturday, October 1, 2011

T-Shirt Upcycle

What to do with a cute but ordinary t-shirt for my cute but extraordinary teen daughter? Upcycle baby! Lissie really likes Steam Punk designs and Cupcakes, so the challenge was set. I did both of these shirts last night. It was quick, easy, cheap and fun! From start to finish, it took me about two hours.
1) Find some T-shirts that need a little bit of love....First came the darker pink shirt.  I decided to go with a cupcake on that one, so the fun began by drawing out some samples...


2) We have a winner!  Poor winner was then cut apart to be used as a pattern. 

3) I went through my felt stash and chose a sparkly white and a charcoal gray for the icing and cake part. (By the way, I love, love LOVE those scissors.  My family knows that they never get used for anything but fabric and ribbon so they are SHARP!)

4) To bring my little friend to life, I embroidered a face and then appliqued him to the shirt using a running stitch.

5) Tada!  Done already and my episode of NCIS is not even over yet!

6) The real test came when Lissie saw it...the verdict is in....it was love at first bite (groan!  I had to get a cupcake pun in...sorry, I will behave now.)

Shirt #2 Light Pink

1) First I picked a stamp image that I know Lissie like and used a permanent ink called Staz-on to stamp it on the shirt.  I could have left it like that, but decided to embroider it using 1-3 strands of floss depending on which part it was.  I love to embroider and it is so quick to do.  Thread a needle and hit play on the DVD player...
2) Finished the first one and enjoyed another episode of NCIS (Told you this was a quick project).  As you can see below, we have an embroidered balloon. 

3) Test #2 passed!  My Steam Punk loving chickadee lurves this shirt!  Score two for Mom!  What do you think?

Posted by Picasa

Sunday, March 20, 2011

Digital Design.....

Hold the phones folks!  I have to eat a big old helping of crow pie.  After years of saying, "I'll never go digital...I am a tactile scrapbooker....well, I tried digital.  And I liked it.  A lot.  A whole lot.  While it won't replace paper art for me ~ let's just say wow!
  Let me start at the beginning.  A couple of weeks ago, one of my friends called and asked me if I was busy for the next two Mondays, and if not, did I want to take a class up in Red Lodge with her.  I said sure.  (Always fun to get out of town.) She called back and told me she signed us up for a Stampin' Up My Digital Studio's class.  My first thought was...uhm crap.  My second thought was, well, at least we get out of town for a couple of hours.  Imagine my chagrin when I was fascinated.  Boy has it come a long, long way.  You can add drop shadows, texture, digital stamps....so many possibilities. 
I think that it actually makes me feel freer to paper scrap, because I can throw most of my HUGE backlog of photos onto digital pages and then do my favorites on paper as well.  Here are my first two attempts.  Here for you is one of my favorite pictures of my little Sis and I , and the second one is my daughter.  Best part?  I have it on my laptop, so I can play anywhere. 

Sunday, January 30, 2011

Pretending Spring has Sprung

I will not look outside.  You can not make me.  It is 1 degree.  You read it correctly.  1.  Gets better, according to the news, it feels like -15 with lows tonight predicted at -25.  That is RIDONCULOUS! So in protest I have decided to think Spring by posting more pictures of items made for my Stampin' Up friend.  (see last post for her website) Unless otherwise stated, all products used were from Stampin' Up.


This is a simple Ikea mirror stamped with black Stayz-on and an awesome birdhouse stamp from the new mini catalog.  I trimmed it out with blue and cherry bias tape ribbon, topped by one of SU's new bezel slides.  Underneath the slide, is a stamped egg from the same set and a tiny butterfly embossed die.  In the corner of the mirror, you will see a decorative element made from the corner punch and then run through an embossing folder.  The brown ribbon in the bottom left is not part of it, it is just sticking up from another project.


This is a plain wooden plaque that I base coated in an edelweiss blue.  I tore the bird and nest out of a piece of scrapbook paper and edged it in old olive ink.  Using my watercolor crayons, I gave the bird a little color.  The eggs were already that glorious blue, so I used some mini pearls to "jazz" them up.  The word Chirp was cut from old olive cardstock and a pearl was used to dot the i.


This was a paperweight I got at Hobby Lobby for a great clearance price after the 4th of July.  It had a strange rooster with fireworks in it, so I tore that off and replaced the backing with chipboard.  The background was another piece of scrapbook paper.  I used an alphabet set from the catalog to stamp the word Create and free hand cut it out.  I used a little bit of the water color crayon on the flowers and then glammed them up with a little gold smooch ink. 


This started out as a wooden cut out one of my friends was getting rid of.  I rubbed several colors of craft ink from the rich regals collection on the wood to color it.  I then "fussy cut" some of the left over scrapbook paper to cover the edges.  The saying was embossed onto cardstock and then cut out.  A little glitter always adds some fun, so I rolled the edges in the new chunky vintage glitter.  Slap a magnet on the back and the pear has a new life. 


These blocks were floating around my craft room.  I think that I got them from Oriental Trading originally.  They were already white washed so I simply cut squares for the front, one of the bird house and two of the birds and mod podged them on.  I added strips for the sides.  Using the same alphabet die as the Chirp, I added the words.  Small finishing touches, wrapped the Dare block in ivory bias ribbon and brought the ends up through the center of a flower that I had stamped.  After they were through, I threaded a button onto them and tied the ends.  The whole set of blocks took about 20 minutes. 


This one also started out as a simple piece of wood with scrapbook paper podged on.  I cut a topper out of old olive and used the lace edge punch.  I wanted a little subtle dimension, so I stamped the edges with a floral scroll stamp and then stamped and embossed the hummingbird from the same set.  The word Fly was cut with the Big Shot. 

These are what I have so far, however, I have many more ideas floating around in my brain.  Hope you enjoyed a little taste of spring while winter is howling around outside. 

Tuesday, January 25, 2011

A Rose Wreath by any other name....


     I have been trying to get back in the groove of posting on this blog.  I have been holding back because of several reasons, some stupid, such as not having step by step pictures, and others not so stupid like my son being sick for so long. 
     I even toyed with the idea of letting it die.  But I would kind of miss it.  It really is a creative outlet for me.  So, one of my goals this year is just to post and trust that if anything is not clear, you will just ask.  Many of you email me privately anyway instead of commenting, so let me know if that works for you. 
     Many times just looking at a picture will spark creativity, so I am going to just try and get my mojo back by going at it one step at a time.  Some posts will have instructions, some just a few pictures and a thought.  Hope you enjoy.  Happy 2011. 

     Dipping a toe into the blog pond today with a quick wreath I created in about 30 minutes for a friend of mine.  She is a Stampin' Up demonstrator http://www.ddstamps.typepad.com/ and lent me some goodies to experiment with.  She was doing a display and wanted to have some out of the box uses for the new products from the mini catalog.  Let me tell you...so much fun.  This was right up my alley, no restrictions other than I use their products.  I will post some of the other things I did later, but I wanted to get this one up. 
Items used.

Green floral wreath from the Dollar Store
Muslin
First Edition Designer Series Stampin' Up paper (SU)
Old Olive Card stock SU
Cherry Cobbler Card stock SU
1/4 Hole Punch SU
Scallop Circle Punch SU
Ornament Punch SU
Table Setting Die (Big Shot) SU
Old Olive Ink SU
  Cherry Cobbler Ink SU
Elements of Style Stamp SU
Cherry Cobbler Button SU

Other: Stylus, hot glue gun


I tried to give you  a close up of the flower. 
Let's break it down into steps
  1. Tear muslin into 2 inch strips and hot glue around the wreath to cover the green. I left mine a little frayed.   Tear one strip 2 1/2 inches wide and form the loop for hanging.  Glue the two ends together and then decorate with the button.  You can sew it if you like, but this time I just glued.
  2. Punch 3 ornament shapes per flower (9 total) out of the old olive.  If you don't have that punch, free hand a leaf...just think of a long heart. 
  3. Using the stylus I "carved" lines into the leaf, no rulers, you want it to look natural.  I then inked the edges/lines with the old olive and stamped the floral image background from the stamp set over the whole leaf for dimension. Continue for the next 8 leaves.  I promise it goes quickly!
  4. With the Scallop punch, I cut 6 scallops from the cherry cobbler.  Set 3 aside.  Lay the other 3 out because they are the bases for your roses.
  5. The table Setting Die has a spiral cut circle on it that you can use for the rose.  If that item is not in your toy box, simply cut three 4 1/2 inch circles out of the First Edition paper (looks like a dictionary paper.- lurve it!!!)  Then simply cut them in a spiral and ink the edges.  Don't get hung up on them looking perfect.  We are creating a flower and want it to look natural. 
  6. Now the fun begins, start at the middle of the spiral and pinch the end to form a bud.  Continue to curl and twist the paper around to form a flower, adding judicious bits of hot glue as needed to hold in place. When the flower is formed, glue to your cherry cobbler base.  Make two more flowers.
  7. You may notice gaps here and there.  This is where your other scallop circles come into play.  Simply cut them apart into petal groups and use your stylus to break the stiffness down.  You do this by laying it on a mouse pad and rub the stylus in circles on it.  You will notice your card stock change texture and curl a little.  Use a dab of glue to fill any gaps in the flower. 
  8. In the home stretch!  Place three leaves in a triangle and glue a flower in the center.  Using your 1/4 inch punch, add a few circles in the center of each flower.  I chose to break those down with the stylus as well. 
This really was easy peasy...promise! 
Hope you bring a little spring into your winter and give it a try!


Thursday, November 25, 2010

Wowser!  Wouldn't this be great!!!  I never win, but hope springs eternal and this is one generous give away!
Thanks for the chance!

TodaysMama (link to: http://bit.ly/tmwishlist) and GameStop (link to: http://bit.ly/gamestop10) are giving away a sleighful of gifts this holiday season and to enter I’m sharing this meme with you.


1. What is your holiday wish for your family?

To get my oldest son out of the hospital (he has been in 5 weeks on Monday) and be able to have my husband and four kids togther instead of being in different states.  (We are in UT at Primary Children's and my family is home in MT)  All together and at home.  :-)


2. What is your Christmas morning tradition?

We all get up at 6 and open presents by going in a cirlce.  It is a fun time to see what everyone got and appreciate how lucky we are to be hanging out together.  Then we make a big breakfast together.
3. If you could ask Santa for one, completely decadent wish for yourself, what would it be?

A scrapbook retreat

4. How do you make the holidays special without spending any money?

We make ornaments together.  We challenge ourselves to use craft supplies that we already have.  We also drive around to look at lights and look at the scrapbook pages of past Christmas celebrations.

5. What games did you play with your family growing up?

Yatzee, Parcheesi, Battleship, Life, Payday, Uno...to name a few.  loll

6. What holiday tradition have you carried on from your own childhood?

Getting up early with my kids and playing the new family board game together later in the day.
7. Where would you go for a Christmas-away-from-home trip?

We already are this year.  Because of Alex's hospital stay we will be in Utah.  Luckily my in laws live in a nearby town.

8. Check out GameStop (link to: http://bit.ly/gamestop10) and tell us, what are the three top items on your GameStop Wish List this year?

An XBox Hard Drive
A Kinect
The Kinect Dance Bundle

Tuesday, September 28, 2010

Witches flying through the sky.....

This is a song that my Mother-in-Law sings with our kids once it starts to get close to halloween.  Now it pops into our heads when the leaves start changing and the weather gets crisp.  Strangely enough though, there isn't a witch to be seen in this post.  However before you cry "false advertising!" There are some very cute fall and halloween cards to inspire you to dig into your paper and break out your creativity or as we say on this blog your kee~rativity. loll                   
  BTW doesn't this pretty pic of one of the trees in my backyard make you want to jump in some leaves?  I LOVE fall!  It is my favorite season!  It is gorgeous, just cool enough to wear long sleeves and cuddle up in a blanket to read.  No dripping heat or nasty windy freezing days, just fall sweet fall.  Enjoy.

This cute little fellow was made with the old velvet paper backed floral ribbon that used to be used on wreaths and flower arrangements. I started with your standard sheet of 8 1/2 by 11 sheet of cardstock.  Cut this in half so it measures 5 1/2 by 8 1/2 and fold to get your card.  I inked and tore it up to lay in strips across the card and added eyes made from circle punches.  Don't forget the hint of white pen on the black part of the eyes, it really makes them stand out.  I added a little "headband" of torn Halloween paper and some leftover sticker letters to spell  EEK down the side.  This is a great way to get rid of your random leftovers. 
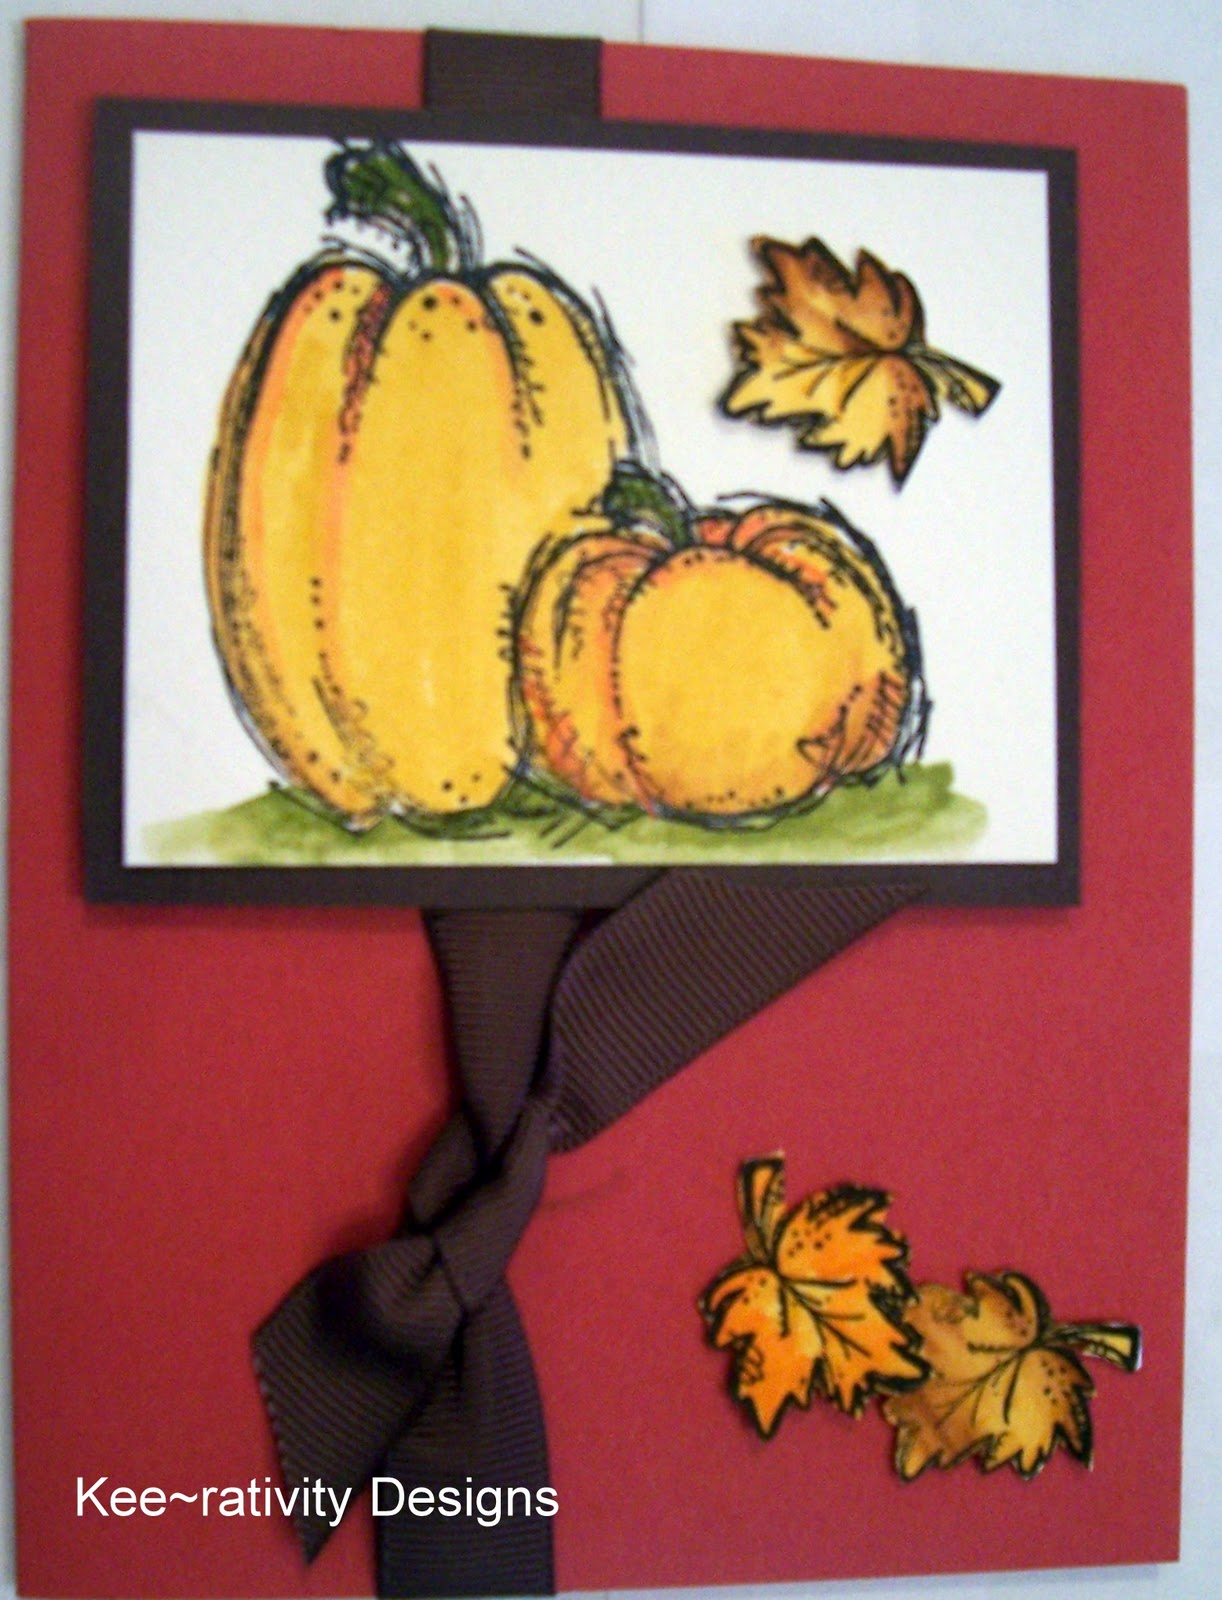
This fall card is very simple and fast ~ but looks like it took a long time.  Again start with your standard sheet of 8 1/2 by 11 sheet of cardstock.  I chose a nice rusty fall colour.  Cut this in half so it measures 5 1/2 by 8 1/2 and fold to get your card. The leaves and pumpkins are stamped on watercolour paper with a permanent ink (very important).  Then I took watercolour crayons (you could use crayons, pencils or your kid's paintboxes) and very quickly and lightly coloured the images before I wet the paper.  Run a wet brush over the images to blend and then while the paper is still wet add your deeper colours to your images to create depth.  Mount it on chocolate paper and finish off with a grosgrain ribbon.  The longest part of this card is cutting out the leaves.  If you don't want to cut them out, use a punch or tear them in a strip.

Once again start with your standard sheet of 8 1/2 by 11 sheet of cardstock.  Cut this in half so it measures 5 1/2 by 8 1/2 and fold to get your card. The base of this card is gray.  Same floral ribbon as before, but this time I left it uninked and alternated it with strips of halloween paper.  I cut a simple rectangle and free handed a "doodle" edge and Boo in white ink.  A simple orange flower sequin and a black glitter brad give it the right finishing touch. 
This card looks more complicated, but really goes together quickly.  If you notice all of the cuts are straight which speeds things up.  The base card is orange.  Using the same cutting directions, I started with your standard sheet of 8 1/2 by 11 sheet of cardstock.  Cut this in half so it measures 5 1/2 by 8 1/2 and fold to get your card. I built from the bottom up.  Start with a black rectangle the width of your card and use a scallop punch along the bottom.  I used a Stampin' Up one, but if you don't have that punch, use a different one, pinking shears or simply tear.  After that is adhered down, move up to your next layer.  Starting with a smaller rectangle of halloween paper, I added torn velvet floral ribbon to the bottom.  I simple wrapped some fuzzy multi coloured yarn along the top and adhered all of it down.  Along the top of this rectangle is a grosgrain olive green ribbon running across the card and finished with a little bit of halloween bling on the side.  Another smaller rectangle of black with purple sequin flowers.  The entire card was made in minutes with scraps from the bin.  Love recycling!

Another fall card with the watercolour technique from above  this time I started with a base card of chocolate, cut from an 8 1/2 by 11 sheet of paper to measure 4 1/4 by 11.  Sometimes it's nice to change up the way things fold.  A rusty orange was adhered over this. Next I built the card in layers.  Another chocolate rectangle.  I tied a ribbon around it before I attached it to the card.  Along the top are four simple epoxy bubble stickers.  They photographed strangely, but on the card are they give a simple bit of shine.  Next layer is a rusty red rectangle, scalloped along the bottom and layered off center on the card.  Next is yet more chocolate ( a girl can never have enough chocolate!) topped with a yummy little watercoloured pumpkin.  Stamp a sentiment on the bottom and you are good to go. 

A little fall fun to get you started.  Now I am off to curl up with a good book and watch the leaves fall....


Wednesday, September 8, 2010

Butterfly Mobile

After a couple of scary, stressful crazy months, (all ended well) I have blown the dust off of my sweet (read that "suuuweeet!' craft room) and put on my creative vibe again.  Welcome back my friends. 
Inspired by summer slipping away and the happiness of blue and green together, I finally made the butterfly mobile I have been craving for so long!   I was creatively juiced by one I saw in Papercrafts magazine a year or two ago. I loved how the butterflies moved in the breeze.
First you have to gather your materials.  I like to try and create mostly with what I have on hand so I looked around...
You could certainly cut butterflies by hand, but I was surprised at how many butterfly things I had once I started looking. I also pulled out some ink, stencils and glitter glue.

Then the fun began!  I went through my paper scraps and found all of my delicious blue and green shades.  I also used paper from the Little Yellow Bicycle "Vita Bella" line.  Time to stamp, cut and pile up those butterflies.  :-)


Remember to cut doubles!  This important for a later step.  Once you have a joyful stack like this, they need a home.  I used a lampshade that I found at a second hand store.  It was $2.00.   It was also covered with enough hot glue to build a shelter and scary fabric and fringe from the 80's.  A little therapeutic ripping, tearing and destroying, showed me the lovely brass frame of the shade. 
I couldn't get all of the glue off of the frame...even using tricks like soaking, freezing and warming up the metal.  So instead I used it for a creative springboard.  I sprayed it antique white.  I then peeled little bits of the glue off so that it looked like an old iron frame.  Love it!  Thanks crazy 80's hot glue lady!
Next I needed a support for the butterflies, toyed around with using fishing line, but I then found this awesome pearl cotton thread. 

I cut several lengths and then started laying out the butterflies.  I had some shiny flower sequins in blue and green that I used for sparkle and spacing.  I wish that I could give you a formula, but it is really all about personal preference. 
You could start gluing while they are on the table, but I found that hanging the lampshade and tying the threads to that first worked a lot better. 
Step one ~ Tie the threads
Step two ~ Glue some rhinestones back to back on the bottom of the threads to weigh them down.  I used flowers and circles both, but stuck to white, green and blue.
Step three ~ Start gluing your butterfly pairs back to back.  I used a line of scotch paper glue just down the center so that I could "open" their wings. Start with your largest butterflies first, then fill in with the sequins and smaller butterflies.

Time to open up their wings and let these babies fly. 

I liked the bit of lift and life it gave the mobile to open the wings like this. 
Next come the details that set this apart.

Don't you just love your glue gun!  I mean healthy love, not like the previous owner of the lampshade.  LOL...This one has the option of removing the cord once it heats up so that you can maneuver it a little bit better.    I found this great ball fringe and netting at a quilting store. They are actually the same fresh spring green, but the photo doesn't do it justice.   Now onto the details.

Ball fringe glued.  Three larger butterflies hung at various levels (and angles) in the middle and netting wrapping the upper part of the lampshade. 
This is from the underside.  I needed a way to hang the mobile, so I worked with the original structure of the lampshade.  I punched a scalloped circle out and glued it to the part of the lamp that usually attaches to the base.  I looped some of the netting through a bead and used a ginormous needle to thread it through the original hole.  I just went right through the paper.  Seriously, you should SEE this needle, I have no idea what it was originally used for.  Now, it lives for crafts and not making people cry....Now, one more look at all of this happy flutterly cuteness together...and the whole project cost me less than five dollars because used the materials I had. 

Believe it or not, the whole thing took just one evening...about 4 hours.  I did have some butterflies previously cut, but I added that into the 4 hour time bracket.  Your imagination could go wild.  My artistic daughter is making one that has skulls, pirates and her drawings on tags.  My clever niece made some of these with scalloped circles...but really you could use any shape that makes you happy.  The trick it so make the strands heavy enough that they will be straight, but light enough to move in a breeze.  Enjoy!

Thursday, March 4, 2010

test two

Friday, July 24, 2009

Recent Work

Here are some recent canvases that I have done for other people. With all of the house projects we have been cramming in this summer, my poor little studio is getting dusty...Enjoy!


Tuesday, July 14, 2009

Banned Books

I decided to put this on the keerativity blog because it involved books, (mmm, yeah, I am aware that made absolutly NO sense at all.)
In retropect, looking at this list and all of the ones I have read, I am left with the question, am I a rebel or merly open minded towards literature and very annoyed with small minds that ban books?

Little House on the Praire...REALLY people, get a grip! Do yourself a favor folks, read a banned book today. There are some fabulous ones on this list. At the same time, there are a few on this list that I have read and hated. The point is, that we should decide for ourselves if a book is worth reading. This came from my MIL's blog, who in turn took it from her friend.


Banned Books

My friend Susan K. had this list on her blog. It's a list of the 110 most banned books. Take a look at the list and do this:

Bold the ones you've read. Italicize the ones you've read part of. * the ones you specifically want to read.

#1 The Bible
#2 Huckleberry Finn by Mark Twain
#3 Don Quixote by Miguel de Cervantes
#4 The Qur'an
#5 Arabian Nights
#6 Tom Sawyer by Mark Twain
#7 Gulliver’s Travels by Jonathan Swift
#8 The Canterbury Tales by Geoffrey Chaucer
#9 The Scarlet Letter by Nathaniel Hawthorne
#10 Leaves of Grass by Walt Whitman
#11 The Prince by Niccolò Machiavelli
#12 Uncle Tom’s Cabin by Harriet Beecher Stowe
#13 The Diary of a Young Girl by Anne Frank
#14 Madame Bovary by Gustave Flaubert
#15 Oliver Twist by Charles Dickens
#16 Les Misérables by Victor Hugo
#17 Dracula by Bram Stoker
#18 Autobiography by Benjamin Franklin
#19 Tom Jones by Henry Fielding

#20 Essays by Michel de Montaigne
#21 The Grapes of Wrath by John Steinbeck
#22 History of the Decline and Fall of the Roman Empire by Edward Gibbon

#23 The Tess of the D’Urbervilles by Thomas Hardy
#24 The Origin of Species by Charles Darwin
#25 Ulysses by James Joyce
#26 Decameron by Giovanni Boccaccio
#27 Animal Farm by George Orwell
#28 1984 by George Orwell
#29 Candide by Voltaire
#30 To Kill a Mockingbird by Harper Lee
#31 The Analects by Confucius
#32 Dubliners by James Joyce

#33 Of Mice and Men by John Steinbeck
#34 A Farewell to Arms by Ernest Hemingway
#35 Red and the Black by Stendhal
#36 Das Capital by Karl Marx

#37 The Flowers of Evil by Charles Baudelaire
#38 The Adventures of Sherlock Holmes by Sir Arthur Conan Doyle
#39 Lady Chatterley’s Lover by D. H. Lawrence
#40 Brave New World by Aldous Huxley
#41 Sister Carrie by Theodore Dreiser
#42 Gone with the Wind by Margaret Mitchell
#43 The Jungle by Upton Sinclair
#44 All Quiet on the Western Front by Erich Maria Remarque
#45 The Communist Manifesto by Karl Marx
#46 Lord of the Flies by William Golding
#47 Diary by Samuel Pepys
#48 The Sun Also Rises by Ernest Hemingway
#49 Jude the Obscure by Thomas Hardy
#50 Fahrenheit 451 by Ray Bradbury
#51 Doctor Zhivago by Boris Pasternak
#52 A Critique of Pure Reason by Immanuel Kant
#53 One Flew Over the Cuckoo’s Nest by Ken Kesey
#54 Praise of Folly by Desiderius Erasmus
#55 Catch-22 by Joseph Heller
#56 Autobiography of Malcolm X by Malcolm X
#57 The Color Purple by Alice Walker
#58 The Catcher in the Rye by J. D. Salinger
#59 Essay Concerning Human Understanding by John Locke
#60 The Bluest Eye by Toni Morrison
#61 Moll Flanders by Daniel Defoe
#62 One Day in the Life of Ivan Denisovich by Aleksandr Solzhenitsyn
#63 East of Eden by John Steinbeck
#64 The Invisible Man by Ralph Ellison
#65 I Know Why the Caged Bird Sings by Maya Angelou
#66 Confessions by Jean Jacques Rousseau
#67 Gargantua and Pantagruel by François Rabelais
#68 Leviathan by Thomas Hobbes
#69 The Talmud
#70 Social Contract by Jean-Jacques Rousseau
#71 The Bridge to Terabithia by Katherine Paterson
#72 Women in Love by D. H. Lawrence
#73 American Tragedy by Theodore Dreiser
#74 Mein Kampf by Adolf Hitler
#75 Separate Peace by John Knowles
#76 The Bell Jar by Sylvia Plath
#77 The Red Pony by John Steinbeck
#78 Popol Vuh
#79 Affluent Society by John Kenneth Galbraith
#80 Satyricon by Petronius
#81 James and the Giant Peach by Roald Dahl
#82 Lolita by Vladimir Nabokov
#83 Black Boy by Richard Wright
#84 Spirit of the Laws by Charles de Secondat Baron de Montesquieu
#85 Slaughterhouse Five by Kurt Vonnegut
#86 Julie of the Wolves by Jean Craighead George
#87 Metaphysics by Aristotle
#88 Little House on the Prairie by Laura Ingalls Wilder
#89 Institutes of the Christian Religion by John Calvin
#90 Steppenwolf by Hermann Hesse
#91 The Power and the Glory by Graham Greene
#92 Sanctuary by William Faulkner
#93 As I Lay Dying by William Faulkner
#94 Black Like Me by John Howard Griffin
#95 Sylvester and the Magic Pebble by William Steig
#96 The Sorrows of Young Werther by Johann Wolfgang von Goethe
#97 General Introduction to Psychoanalysis by Sigmund Freud #98 The Handmaid’s Tale by Margaret Atwood
#99 Bury My Heart at Wounded Knee by Dee Alexander Brown #100 A Clockwork Orange by Anthony Burgess
#101 Autobiography of Miss Jane Pittman by Ernest J. Gaines
#102 Émile Jean by Jacques Rousseau
#103 Nana by Émile Zola
#104 The Chocolate War by Robert Cormier
#105 Go Tell It on the Mountain by James Baldwin
#106 Gulag Archipelago by Aleksandr Solzhenitsyn
#107 Stranger in a Strange Land by Robert A. Heinlein
#108 A Day No Pigs Would Die by Robert Peck
#109 The Ox-Bow Incident by Walter Van Tilburg Clark
#110 Flowers for Algernon by Daniel Keyes

Tuesday, May 12, 2009

Inspired by...

Inspiration is a muse that each of us seek in different ways. For me, I have to be surrounded by bits of life. Each of them can touch me in different ways.


* Maybe it is my soul that is touched by a bit of light and shadow. The way I place my furniture in my creative space is directly related to the way sunlight and shadow play on the wall.


**Maybe my creative juices flow when a bit of texture, color or shape touch my senses.


***It might be an odd little object that was discarded from a previous owner. It sat homeless, until it touched my emotions.


****Sometimes it is an object that touches my sense of humor. It makes me smile for whatever odd reason.


Each of these things are a part of the puzzle that is me. When they are placed together as a whole, they help me to encourage Inspiration to stop flitting around and visit for awhile. Do her job as a muse and together we create, and dream and create some more. Below are some of the things that help inspire me.


Two of my favorite things, Chocolate and vintage signs! Yum for both the tummy and the eyes!

This makes my soul calm. I am reminded that we not only have a Father in Heaven that loves us, He cared enough to make a world that is beautiful as well as functional.

The most tender green you will ever see. This is the color of creativity, rebirth and renewal. The only time this green doesn't work is when you see it in the fridge on food. :-0 Then it is time to get out of your studio and clean out the icebox! Loll

My favorite flower, look at that color saturation! This was taken by jillclearyinc


I remember practising drawing by studying Leonardo's work...yes we are on a first name basis! :-)


I like to burn candles while I work...something about that small steady flame is comforting. No, I am not a fire bug, I leave that to my husband with the BBQ.


These little owls make me smile with their whimsy. I would love to own the fabric they are printed on.